Have you noticed that once you join Facebook, suddenly every other
site you visit knows who you are? You surf onto CNN, and not only does
the site know you, it tells you which articles your Facebook friends are
reading.
Scary, isn’t it?
It’s all fun and games until you start being tracked!
Welcome to the world of Web personalization, a place where Web
marketers know your name. (And your surfing habits, browsing history and
more.) Click the “Like” button on any non-Facebook page and suddenly
Facebook turns into Big Brother and knows more about you (and your
preferences) than just what’s on your profile. And then you see an ad on
Facebook, and your first thought is “I was just thinking of something
like that!” Really, it’s because you just were LOOKING for something
like that online. Truth be told – Facebook is only one of many culprits
that compromises your online privacy.
So exactly how do you keep every site from being linked to Facebook?
There are a few different ways to keep other sites from accessing your
Facebook profile, some more complex than others.
The easiest way is to use a dedicated browser for your Facebook
purposes only. Even if you regularly use Safari and Firefox, you still
have other browser options, namely Google Chrome and Opera, so it’s
possible to keep your Facebook activity restricted to one browser.
Cnet.com has a link to all of these browsers (and more) here.
There are more involved ways to disable the social plugins that
Facebook integrates with your browser, including this great piece on ThoughtPick. For a more world-weary view, check out LifeHacker’s take on the situation.
Bottom line: Web privacy and tracking is a huge deal on both sides of
the fence – both for marketers and privacy advocates, and neither
faction has any intention of going away anytime soon.
Apple TV
is a digital streaming media device, a piece of hardware that is about the size
of a hockey puck. It allows streaming media to be played on your television
set. (Note that last November, Apple introduced a service named Apple TV+, so similar
to Roku, Apple TV is a device as well as a content provider.)
But today I’m talking about the hardware device. It’s simple in concept: You connect it to your television with an HTML cable, connect it to your network (usually Wi-Fi, but it can be connected wired via an Ethernet cable) and you can start watching a series of channels. Similar to the iPhone and iPad, you can download apps from Apple’s App Store.
But do the apps cost money? And where does the streaming content come from? Is it free or do you pay for it? And how do you get to watch what you want? Great questions, all.
Let’s
start at the beginning; You need an internet connection to get one of these to
work. In lower Fairfield County, Connecticut, we have Optimum. Other areas have
Comcast. Some areas (not here) can opt for Verizon Fios.
Apple TV
is a DEVICE that allows your television to receive streaming video (or audio)
content. Similar devices include Roku, Amazon Fire Stick and Google Chromecast.
(There are a few other also-rans, but these are the big three.) Although they
have their differences, they pretty much all work the same; they connect to
your television using an HDMI cable and you configure them to connect to your
network. (And they each have another remote to contend with.)
They all
have their pros and cos, but basically, they all work similarly. You click on
one of the apps on the screen, and there you go. For example, if you want to
watch Netflix, you click on the Netflix app, sign in (requires an account, of
course), and 30 seconds later you’re watching “Cocaine Island.”
Now,
some of the content is free (YouTube, Red Bull TV, Bloomberg Business), but
most of it requires some kind of subscription (Netflix, Hulu, HBO Go). You can
also sign into your Apple iTunes account and rent movies and TV shows as well.
Of course, there’s a lot more to this than I have time for here – so let’s go to the video tape!
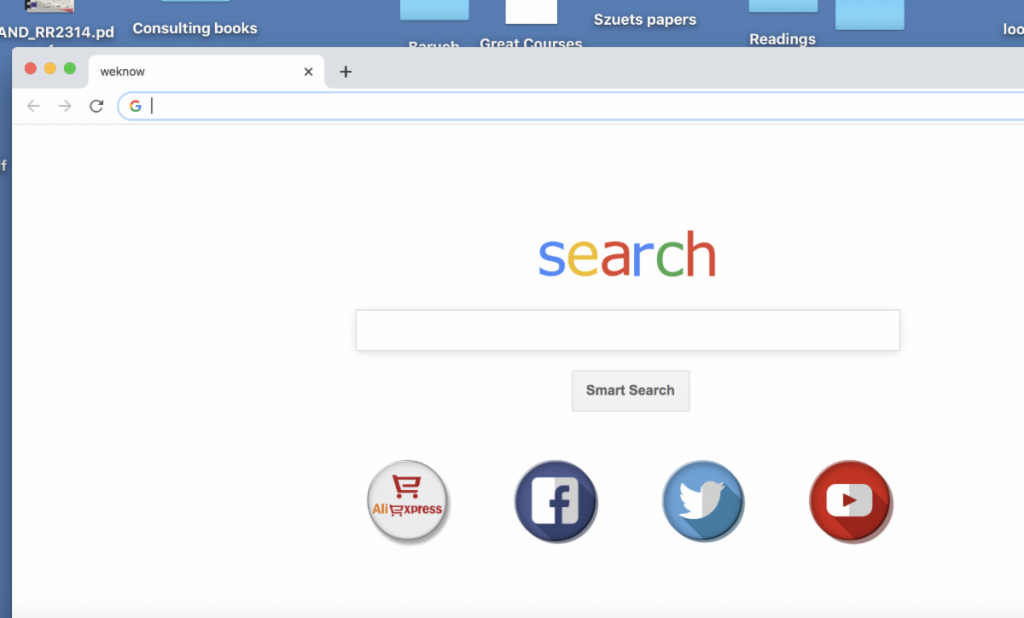
When you launch your
web browser – Safari, Firefox or Google Chrome, do you notice a strange
homepage? Does your homepage look like a cheap Google knockoff instead of the
real deal? (See above) Or perhaps your searches go to Yahoo instead of Google?
If the answer to any
of the above is “yes,” then chances are you’ve been hijacked. Or at
least your web browser has.
Now, that may sound
worse than it really is. This doesn’t mean that somebody has tunneled their way
into your computer; most likely it was installed inadvertently. In almost every
case, it happens when a warning comes up that your Adobe Flash Player is out of
date. So you download the Adobe Flash software, and then things go wrong very
quickly. So you need to know two things – how to avoid installing these
problematic programs from your computer; and how to remedy the situation in
case you’re reading this after the horse was stolen.
So how
do you deal with this mess?
First of
all, run Malwarebytes. If you don’t have it in your Applications folders, you
can download the free version at www.malwarebytes.com. Scan your hard drive –
check to see if there is any funny stuff (e.g. malware) on your computer.
Next,
open your browser. Each browser uses “extensions” – these are where the bad
stuff usually can be found and expunged.
a
preference pane – this is where you can configure a lot of your settings.
Here’s where you will find them:
Google
Chrome: Click on the three vertical dots in the upper right corner of the page,
and select MORE TOOLS > EXTENSIONS.
Firefox:
Pull down on the FIREFOX menu and select PREFERENCES. At the bottom left of the
page, click on EXTENSIONS.
Safari:
Pull down on the SAFARI menu and select PREFERENCES. (Don’t select
EXTENSIONS!) Click on EXTENSIONS in the
Preferences pane.
Now
what? You should remove (delete, uninstall, get rid of) ALL extensions! Even
ones that seem legit and helpful, like shopping and maps. THESE are the ones
that cause grief!
And while we’re in Preferences, you’ll want to reset your home page and search engine.
A couple more things: A nasty recent development in Google Chrome allows administrators to “manage” your browser. Lately, malware has been unleashed that “manages” your browser and is hard to remove. In order to eradicate this threat, take a look at below video. If that looks like too much for you to handle, call in a pro to keep your Mac squeaky clean, at least on the inside.
Quicken, a personal finance management software created by Intuit, is the most common personal financial package in use, bar none. For many years, throughout all the various flavors, it has retained pretty much the same user interface. Of course, it has chucked in a few bells and whistles along the way but has kept a similar look and feel despite new versions and updates.
Of
course, all good things eventually come to an end; the final version of
“Quicken Classic” was released to be compatible with Mac OS X.7 (Lion) in 2011.
A few years later, the “New Quicken” was launched – with a totally different
interface. Longtime users were outraged at the difference, and a backlash
ensued.
But
some hung onto the original software – and an upgrade for Intel-based Macs
allowed users to keep their old software going. But, with the change to Mac
OS.15 (Catalina), it’s all over for those holdouts. No longer will legacy
versions of Quicken run.
The Legacy Quicken Icon
OK,
two things about Quicken: First of all, nothing is certain in life except death,
taxes and Mac OS updates, so the “legacy” version (the one with the
yellow/orange icon) will no longer run on any Mac OS post-Mojave (OS X.14). If
you’re using it and the familiar interface, you will have to freeze your Mac in
time and no longer participate in any future OS updates.
Now,
if you’ve bitten the bullet and have upgraded to the “new” Quicken (the one
with the red and white icon), you don’t necessarily have to worry about post-Mojave
compatibility, so you can breathe easy, at least for now.
But
what you DO have to concern yourself with, is the inability to sync your bank
account to your Quicken file, if you opt not to pay the annual subscription
fee*. Intuit, following the lead of Adobe and Microsoft, have opted to make an
important part of its service a yearly subscription. The good news? You can
still use your Quicken without it – but you’ll have to do a little more work
yourself. Me, I like to balance my accounts manually – letting it happen automatically
makes me become complacent, and I might miss some transactions.
*
Intuit is constantly offering “deals” to subscribe, so don’t pay bust-out
retail!
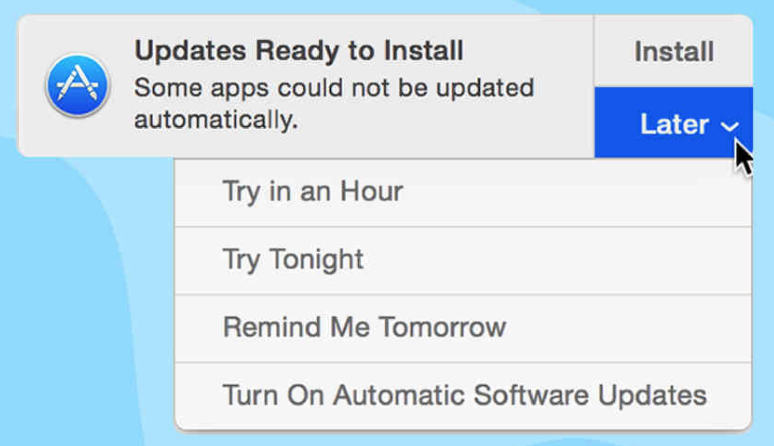
One of the most common complaints I hear from clients is “I don’t know what to update!”
If you own a Mac, it’s a pretty simple process (at least in theory).
Updates for the Apple OS (operating system) are supplied by Apple.
Similarly, updates for other software generally come from the
manufacturer of that package. Ergo, an update for Microsoft Office comes
from Microsoft, Photoshop from Adobe, Norton updates come from
Symantec, etc.
Except for printers, as Apple now handles most of those updates as
part of its OS updates through the App Store. Oh, and speaking of The
App Store, apps bought through there have their updates supplied by
Apple, even though most are third-party apps…
OK, so it’s not quite as easy as it should be. And furthermore, how do you tell which update prompts are legit and which ones are scams? Read on!
OK, updates (for the most part) fall under one of the following categories:
Mac OS
Apps from The App Store
Microsoft Office
Adobe Creative Suite
Adobe (Flash Player & Reader)
Firefox
Google Chrome
Intuit (Quicken & QuickBooks)
Norton Utilities
Other stuff*
*There is CAD and design software, high-end camera and imaging
programs as well as other specialized software packages, each of which
has its own upgrades. If you’re using any software that falls under that
category, you can check with the developer about upgrades.
This is by no means a complete list, but it does cover most of the upgrades that average users would encounter.
How to check for updates:
Mac OS Updates and Apps purchased through The App Store: Pull down on
the apple (upper left corner of the screen and select APP STORE
Microsoft Office: Pull down on HELP menu and select CHECK FOR UPDATES
(Works with recent versions; versions before 2011 are no longer
supported by Microsoft and no new updates are issued)
Adobe Flash Player: Open SYSTEM PREFERENCES (found in APPLICATIONS)
and select FLASH PLAYER> UPDATES and click the CHECK NOW button
Adobe Reader: Pull down on HELP menu and select CHECK FOR UPDATES
Firefox: Pull down on the FIREFOX menu and select ABOUT FIREFOX
(updates, if required, will be downloaded automatically) – click on
RESTART FIREFOX TO UPDATE
Google Chrome: Pull down on the CHROME menu and select ABOUT GOOGLE
CHROME – enable SET UP AUTOMATIC UPDATES FOR ALL USERS (a one-time
process)
Quicken/QuickBooks: Pull down on the QUICKEN (or QUICKBOOKS) menu and select CHECK FOR UPDATES
Norton: Pull down on the NORTON icon in menu (located to the left of the menu clock)
Avoid scams: Never click a link from an email or (especially) a web
browser pop-up alerting you to upgrade any software. Anything that
requires an upgrade can be performed from directly within the
application!
Bottom line: You have to employ an “a la carte” approach to keep the
software and operating system on your computer up to date – there is no
“one process updates all” option available. In most instances, you do
not need to apply an update the minute it’s available (although Flash
Player is starting to claim it’s “out of date” when it’s only one
revision old!), but it’s a good idea to check your software once in a
while.
Full disclosure – this is an updated version of a five year-old post. It’s evergreen and bears repeating. Enjoy!
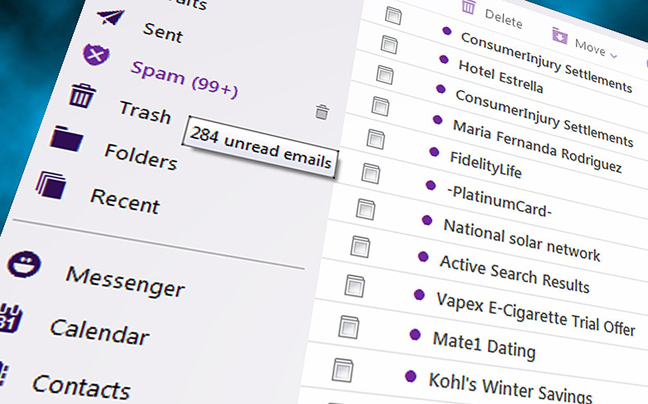
Does this look familiar?
Recently,
while working at a client site, I was checking my email while waiting for
something to install on the client’s Mac. I casually deleted a couple of unread
messages – Groupon and Macy*s – without reading and was asked “how can you
delete an email without reading it??!?”
There’s an
easy answer (for me, anyway); it’s all about the subject line and the sender.
The Groupon offer wasn’t interesting to me, so goodbye. Plus, I can easily go
to its site to see ALL of the offers, and I wasn’t planning on shopping at
Macy*s this week. So, BOOM – off they go into Deleted Items.
I’ve seen too
many people with 10,000+ UNREAD messages in their inboxes – bad news! Not only
does a loaded email box make things run more slowly, it takes up valuable hard
drive space and can cause the mail program to bonk, sometimes resulting in the
loss of many of those messages.
How many of these messages do you REALLY need to save?
All
through my years of working in the industry, whether it’s in a corporate IT
environment, a tech writing job or just freelance, I’ve gotten pretty slick at
keeping my inbox empty, or at least at a manageable level. I’ve come up with a
few easy-to-implement tricks to keep things from spiraling out of control. Yes,
it does take some work on your part – but spending a couple of minutes a day
keeping things tidy is preferable to paying a professional beaucoup bucks
to reconstruct your email.
Another
reason to pare down – some mail providers have a limit on how much space you’re
allocated. Exceed that quota and your email will be out of commission for
awhile.
In no
particular order, here is a six-pack of tips to avoid being a digital hoarder:
#1) Establish
a second email address for retail subscriptions, as well as other mailing
lists.
Give Amazon and other retailers your secondary email address.
Adding a
second (or third) email account to handle mailing lists is a stellar idea,
particularly now that we’re all using iPads and iPods to get our mail. This
serves two purposes – it keeps our “real” inboxes free of non-essential
messages, and because most of these mails are timely, it’s easy to delete them
in bulk once their expiration date has passed. I can’t begin to tell you how
many users still hold onto J. Crew messages announcing a sale that expires in
October 2011.
#2)
Unsubscribe from all mailing lists and newsletters that aren’t important to
you. (Except mine!)
Just be honest
– if you don’t read an email soon after you receive it, it’s probably
irrelevant anyway. And question if it’s even pertinent to your situation – if
you’re on the Hilton Properties list because you stayed at one of its hotels
recently, does any news from them have any bearing on what you’re doing now?
Campaigning costs a lot of money!
This goes
double for political mailing lists. Sign up for one, and your name is sold to
others, and mitosis takes over. And they’re all begging for a handout!
IMPORTANT
NOTE: Don’t bother trying to unsubscribe to “junk” emails that ask you to unsubscribe.
These are trolling mails, trying to trick you into confirming your email address
is valid. Simply delete them and move on.
#3) Configure
your email client to “Quote The Text Of The Original Message”
Having all of
the previous email messages referenced in the current correspondence is another
way to keep your inbox pared down. That way you need to save only the most
recent message to have access to the entire string. In 99.9% of situations this
is fine; however, in cases that require lawyers, documentation and court dates,
you should save EVERY message! (In a dedicated folder, as described below.)
#4) Create
separate folders for completed tasks.
An empty inbox is a happy inbox.
If you need to
save old email messages, store them in newly created folders to help clear out
your inbox. Not only does this help keep your inbox neat and clean, it also
helps your overall organization. Create as many of these folders as you need;
you can organize them by sender, project or date.
#5) Create a
“Pending Issues” subfolder to store messages that require action on your part. (Or
simply “flag” those messages.)
The “Pending
Issues” folder isn’t simply a storage bin to bulk offload messages from your
inbox – think of it as a “to do” list for your action items. But make it a
point to revisit those emails on a regular basis.
#6) Be at
peace with the fact that you’re NEVER going to read those old emails.
Keep calm….
Human nature is funny – there are some things in life that everybody believes they possess; personal style, a sense of humor, good driving skills and excellent taste in music. (My psychology degree hard at work!) Add one more – the belief that they’re someday going to read those old emails. It’s not going to happen. (Just like that pile of magazines and newspapers you’re saving.) And the sooner people come to that realization that it’s OK to let them go, the better off mankind will be.
Apple’s cloud-based storage service is iCloud, and it is not
shy about reminding you every 3.5 seconds to log in. Apple certainly isn’t
alone in the arena – Google Drive and Dropbox are its biggest-name competitors
in the space, and there are tons of lower-tier companies wanting to store your
data.
But let’s take a step backwards – what exactly is “cloud
storage?”
According to SearchStorage.com (the Funk & Wagnalls of all
things storage), cloud storage is “a service model in which data is maintained,
managed, backed up remotely
and made available to users over a network (typically the Internet).”
In non-tech talk, that means your stuff is on somebody else’s computer,
somewhere else in the world and it’s accessible to you as long as you’re
connected to the internet. (And assuming the hosting company doesn’t go under.)
If you screw up and delete something, you can get it back (in most instances). Most
providers offer a bit for free (typically 5GB), using more will cost you.
To start, all of these cloud-based storage services not only
store your files but synchronize them among your various devices. So, the most
up-to-date versions of your documents are available no matter what device
you’re using. But what are the pros and cons of using iCloud for your files as
opposed to one of the other services?
One big pro (or is a con?), iCloud isn’t just about your
files. It also allows you to keep your contacts, calendars, notes, passwords
and Safari bookmarks synced between your devices. (Photos too, but that’s a
subject for next month’s blog.) Which is good for people like me, who need to
keep current versions of these things (mostly contacts, calendars and notes)
synced between my MacBook, iMac and iPhone. (My iPad has a funky battery issue,
but that’s my cross to bear.)
But back to the file thing. Apple goads you into enabling it
when you set up a new Mac, but where the files end up is what confuses users.
The two areas it syncs are the Desktop and the Documents folder, both of which
are located in your Home folder. Users who turn it off suddenly find themselves
unable to access their valuable documents – Apple stores them in folders titled
“iCloud Drive (Archive)” in your Home folder. Good luck finding those on
your own.
So is this a good solution? Here are the pros and cons of
Apple’s iCloud file storage:
Pros:
Free
Easy to enable
Instantaneous syncing
All file types are supported
Cons:
If you disable it, files are moved to a hard-to-locate
folder
If your data exceeds 5GB, then you have to
either offload some data from the two locations (desktop and Documents folder)
or pay for more storage
Not good for team collaboration
If you use Outlook 2011 as your mail client, you
definitely will exceed the 5GB threshold for a free account
Time for the gold watch? Or time to whip out the gold card?
You’ve seen the warning signs – the spinning
beach ball, the bouncing icons in the dock, the agonizing eternity it takes to
boot up. Yup, all the signs of an aging computer.
But is it
time to kick it to the curb and whip out the credit card at Best Buy or The
Apple Store? Or would a little time and effort fight off father time and give
your Mac a few more golden years with you?
At the
risk of sounding like a bad motivational poster, for every problem, there’s a
solution. Usually. So here is a list of common issues and what you can do to
remedy them.
Problem: Spinning Beach Ball
Apple calls it “Spinning Wait Cursor” – we call it the “Beach Ball of Doom.”
Issue:
According to Apple, it’s “when an application cannot handle all of the events
it receives.” Translation – there’s too much going on at once.
Solution:
You may have to force quit any non-responding applications in order to get out
of the immediate crisis.
To force
quit:
Click on the finder icon in
the dock. That’s the one at the far left (if dock is on the bottom) or at the
top (if your dock is on the left or right).
Click on the Apple icon (top
left corner of screen) and pull down to FORCE QUIT.
Highlight any non-responding
application in the list and click on the FORCE QUIT button in the lower right
corner of the window.
Select the application you want to force quit; then pull the trigger.
Problem: Taking forever to open applications, start up, etc.
Issue:
Some of your settings may be FUBAR and need to be cleared up.
Solution:
Try “zapping the PRAM,” which is this:
Shut down your Mac.
Restart and IMMEDIATELY hold down the following keys: P R Option Command all at once.
Keep holding the keys down until the startup chime sounds three times. Release as soon as you hear the third startup chime.
This is
sort of an exorcism for your Mac – it casts out evil spirts and such.
* Hot
tip: Take a look at the keys and see how to position your fingers BEFORE trying
to restart. Time waits for no man, and if you delay here, you’ll have to start the
entire startup process over. Practice makes perfect.
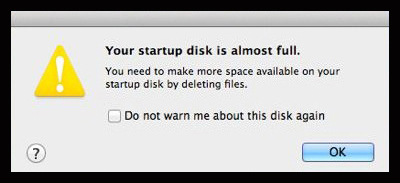
Problem: You’re out of hard drive space
Run, don’t walk when you see this warning!
Issue:
You probably have some junk files that need to be trashed.
Solution:
First, empty the trash. Then check the following folders for files no longer needed:
Downloads:
This folder will contain installers, receipts and other stuff you’ve downloaded
throughout the years. Any installers – out they go. The other stuff, you’ll
have to sift through. When in doubt, throw it out!
Documents:
Same deal. You’ve saved a lot in Documents, so again, be prepared to look
before you trash anything willy-nilly. Also – if you’re NOT using a Microsoft
mail client (Entourage or Outlook), you can open the MICROSOFT USER DATA folder
(in Documents) and get rid of any mail “identities.”
Pictures:
If you have an old ALREADY CONVERTED iPhoto Library, you can trash that.
* Important
safety tip: Don’t toss ANYTHING out if you don’t have a current backup!
Still
nothing? Maybe it’s time to call in a pro to see if anything else can be done.
There are a few non-user friendly things that can be done – RAM upgrades,
swapping out the old hard drive for a slick, faster SSD or simply knowing which
files in the LIBRARY are able to be safely deleted. Any technical pro with an
ounce of integrity will tell you if shoveling more time and money into a dying
computer is a bad idea.
Last month, I covered some basics in organizing your pictures using Photos on your Mac. This month, I’ll dig deeper into some of the most commonly-asked questions.
So – we covered ALBUMS, EVENTS and KEYWORDS last month. There are a couple of more ways to help with your massive collection of digital pictures – some which people think are great, while others think they’re a total invasion of privacy. These are PEOPLE and PLACES.
Want to read more how Apple learns more about you? Click here.
Apple allows you to “tag” faces in its Photos application. A good idea? It depends on how you feel about having a tech company being able to analyze your face. Where does this go? Part of a database that tracks your movements? Connected with kiosks in malls that that monitor your movements and shopping habits?
Whatever. Bottom line – you can tag a face in your Photos library, and that Apple, in its infinite wisdom, has the tech ability to scan your pictures and create a “People album” of familiar faces when enough photos are found. But personally, I know who is who in my Photos library, so I don’t need to go through that bother and help fill a tech giant’s servers.
Places is another way to sort, in a no less intrusive manner, your pictures. Unlike People, Places is configured on your iPhone (or iPad) to “drop a pin” on where you’ve taken the picture. Sounds like a good idea – but can result in a compromise of your privacy if you’re not careful, revealing exactly where and when it was taken.
That said, in order to disable (or enable it, if you dare), you need to configure it on your iPhone. Tap on SETTINGS > PRIVACY> LOCATION SERVICES > CAMERA and make sure it’s on Never. (Or WHEN USING THE APP if you want to use that feature.) Like I said, some people love this feature, and some loathe it. Have at it.
BONUS TIP!
Another neat trick: To find out which of your pictures is NOT contained in an album within your Photos library, do this:
Pull down on the EDIT menu and select NEW SMART ALBUM
Name the smart album ORPHAN PICS (or whatever you want)
Under “Match The Following Conditions,” configure the pulldowns as ALBUM > IS NOT > ANY. Click OK.
Now, you’ll see a “smart album” named “Orphan Pics.” This is a group of photos that are not associated with any of your albums. Here, you can pull them into any album you choose (or no album at all, if that’s what you want.)
Once Apple forced us to ditch iPhoto and migrate to Photos, many users have been living in a state of confusion.
The first reaction to Photos – that it is a dumbed-down version of iPhoto.
Fair enough. Although there are a few iPhoto users out there, fighting technology until they can’t, most of us are stuck with having to use Photos (unless we look further afield and find a suitable third-party solution, which there isn’t a clear winner).
So – we’re stuck (for now, anyway) with Photos. But how do we maximize the features and organize things so they make sense?
First of all, let me clear up the most oft-asked question I’m asked about Photos: What is the difference between ALBUMS and EVENTS?
EVENTS are a group pictures you import off your camera or iPhone at one time. Old school analogy: You go on vacation, you take pictures and have them developed. When you get the envelope of pictures from your trip, those pictures make up your EVENT.
ALBUMS are a collection of photos you create yourself from your entire Photos library. Old school analogy: Your album is a book and your Photos library is a shoebox full of pictures. You put whatever pictures you want in your book, in any order. That collection of photos you have chosen to be in your book are your ALBUM.
Personally, I don’t care about EVENTS. I’m a date guy, so I like being organized by keeping my photos in chronological order. Also, I have multiple Photos libraries; one is my current library, one spans from 2000-2017, one is from scanned pictures from the previous century and the other contains scans of tickets from events I’ve attended.
Using KEYWORDS
Keywords are words that help you identify photos. If you to add a keyword to a group of photos (and note, they don’t have to be contiguous), perform the following:
In PHOTOS, under the VIEW menu, select METADATA and confirm that KEYWORDS is enabled (you’ll see the checkmark – see below).
In your Photos library, highlight (by dragging on a group or clicking single pictures) the pictures you want to assign keyword to.
Once the pictures are selected (indicated by a highlighted band around them), type Command-I (I as in Info), or right-click (Control key and click) and select GET INFO.
Enter your keyword in the KEYWORD field (see below).
Quick tip: Using the Command key (to left of spacebar) will allow you to select non-contiguous pictures.


 Last month, I covered some basics in organizing your pictures using Photos on your Mac. This month, I’ll dig deeper into some of the most commonly-asked questions.