May 18, 2021
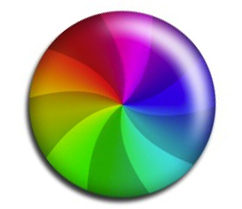
A Few Ways To Help Rid Your Mac From the Dreaded Spinning Beachball of Doom

Now that summer is rapidly approaching, the only beach ball any of us wants to see is at the beach, and certainly not on our computer screen. But for most of us, this is a common occurrence unfortunately.
What causes the spinning beach ball on the Mac?
According to MacWorld, it’s because your Mac’s hardware can’t handle the software task at hand. Which makes sense, but is annoying when it’s a simple task, something mundane like launching Google Chrome. Short of throwing your computer out the window, is there anything you can do? Is it avoidable? Something you can easily remedy?
Here are some tips to help keep the beach ball out of your Mac:
Zap the PRAM: Kind of like an exorcism for your Mac, it’s a simple process. Restart your Mac, and THE SECOND it beings to boot up, hold down the following four keys: P, R, Command and Option.
You’ll need to be prepared, because things move quickly. If you use your right hand, put your pinky on the P, your index finger on the R and your thumb on the Command and Option (which are to the right of the space bar). Let the startup chime sound three or four times.
Note: Some wireless keyboards have trouble with this. Use your charging cord to connect it to your Mac if you can, otherwise try with a wired keyboard.
Clear the Cache: This one not only helps with speed, but also can help solve a nearly-full hard drive. In FINDER, pull down the GO menu while holding down the OPTION key and select LIBRARY.
The Library folder is full of stuff that helps your computer work but is also the repository for a lot of garbage too. Once the Library folder is open, look for a folder called CACHES. Open CACHES and select all of the items inside and drag them into Trash. (You may need your computer’s admin password to proceed.) Empty the trash and restart your computer.
(Important) note: Don’t trash the CACHES folder itself; simply the contents within.
Run Disk First Aid: Open your UTILITIES folder (inside APPLICATIONS) and find DISK UTILITY. Launch DISK UTILITY and select your hard drive from the list on the left. (It’s usually the top one.) Click on First Aid on the menu bar and confirm you with to run First Aid. This can knock off some permissions problems. If you’re able to boot your Mac from an external (or recovery) drive, that will do a more thorough job.
Note: Confirm you click on First Aid and NOT Erase. That is the recipe for a horrible day.
