June 18, 2021
Consolidating ALL of Your Pictures In One Library (Or Not)

Keeping your pictures organized on your computer isn’t a task for the faint of heart. Years of upgrading computers, the switch from digital cameras to iPhones and a change of Apple photo software (iPhoto to Photos) can certainly make a mess of things.
So now, you may have multiple “libraries” of pictures, legacy iPhoto libraries that may (or may not) have been imported to your current Photos library. Not to mention photos that have the incorrect date due to the time/date not configured on the digital camera at the time. Plus, those crazy old family photos that were scanned. And the photos that were emailed to you. And sent via text. And are my Google Photos still available?
OK, first things first. Apple’s picture storage software is called Photos, which superseded its previous product, iPhoto. Both iPhoto and Photos work as an album – meaning all the pictures are into one big file. And when I say big, I’m not kidding, these things can easily exceed 200 GB. Yup. So, a Photos library is one big file.
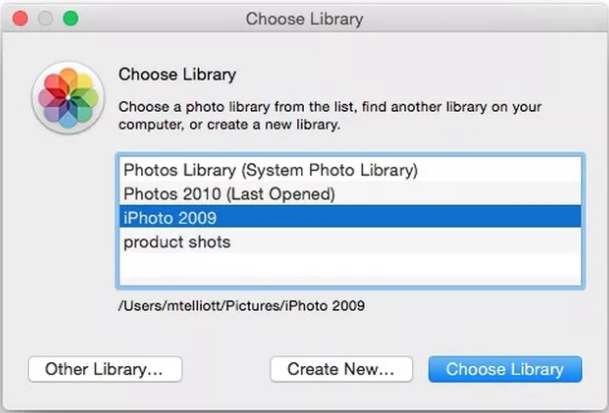
Now, you may have multiple Photos libraries as seen the illustration here. There is no right or wrong; some people like dividing their photos into eras. (I do, so it must be normal!) I do that so things don’t get too bloated. I don’t fully trust the Apple people with a huge Photos library, so I keep mine small. And back them up regularly.
BUT – if you want to combine multiple libraries into one huge one, do this:
Pick one library (the biggest one is your best bet) to be the “master” Photos library. Then, open one of the smaller ones.

- Click on “Library” in the left-hand column.
- Select all the photos in your library by pulling down the EDIT menu and selecting “Select All.”
- Pull down the FILE menu and select “Export.”
- Select a destination for the exported photos. (Usually, a new folder on the desktop is your best bet.)
Allow the exporting process to finish. If there are thousands of pictures, it could take hours.
Once it’s over, open the “master” Photos library and do the reverse: Pull down the EDIT menu and select “Import.” Navigate to the folder on your desktop and import those pictures. Note that there might be duplicate pictures in the two libraries; opt to “skip” those.
