The Only Monthly Mac Blog That Matters…

Category: Macintosh Computers

Firefox – Maybe it’s Time to Move On


firefoxgraveOut of the three major web browsers, it seems (to me, anyway) that Firefox gives me most trouble. I find myself having to force quit Firefox more than all my other browsers combined. (I use Firefox, Safari, Chrome and Opera each for different tasks.) It could be that, because I use it primarily for Facebook, that Facebook is loading me up with cookies or other files.

But then again, the culprit might not be Facebook, because it seems to mostly occur when I click on a story that originates from Facebook. However, I am not sure whether that has anything to do with the browser I’m using, or I’m exposing my Mac to the dangers of cookies, adware and other sorts of nefarious stuff.

Firefox debuted in Fall 2002 – perfect timing it turns out, as Microsoft’s Internet Explorer for Mac was checking its parachute. The only other viable option at the time was Apple’s Safari; however, it had the (deservedly accurate) reputation as not being able to handle certain (mostly secure) websites. A third-party option was needed to keep the playing field level, and Firefox quickly became more popular than Safari in the Mac world.

Google certainly wasn’t going to miss out on that action; it debuted its Chrome browser five years later. Suddenly there was another contender in town and for whatever reason, Chrome was able to handle whatever website it threw itself at, something Firefox and Safari have proven unable to do. Plus, Google is making inroads in the educational world, and students of today are using Google Docs (which, of course, requires Google Chrome).

So this brings us (more or less) to today. Google Chrome is the best browser out there, giving users the least amount of trouble and crashes. I still use Firefox, strictly for Facebook (I don’t like to cross pollinate my web browsing; crashing on TeamRock.com stories are probably a sign that I should be clicking links less willy-nilly) and I use Safari for eBay. Opera I use for managing somebody else’s site, and there’s also TorBrowser, something I find unusable.

Further reading: Check out an early blog post I wrote, “How to Untangle Your Browser From the Grips of Facebook.”


Continue Reading

Start Making Sense: Understanding Updates On Your Mac

appstore

One of the most common complaints I hear from clients is “I don’t know what to update!”

If you own a Mac, it’s a pretty simple process (at least in theory). Updates for the Apple OS (operating system) are supplied by Apple. Similarly, updates for other software generally come from the manufacturer of that package. Ergo, an update for Microsoft Office comes from Microsoft, Photoshop from Adobe, Norton updates come from Symantec, etc.

Except for printers, as Apple now handles most of those updates as part of its OS updates through the App Store. Oh, and speaking of The App Store, apps bought through there have their updates supplied by Apple, even though most are third-party apps…

OK, so it’s not quite as easy as it should be. And furthermore, how do you tell which update prompts are legit and which ones are scams? Find out more about updates here.

OK, updates (for the most part) fall under one of the following categories:

  • Mac OS
  • Apps from The App Store
  • Microsoft Office
  • Adobe Creative Suite
  • Adobe (Flash Player & Reader)
  • Firefox
  • Google Chrome
  • Intuit (Quicken & QuickBooks)
  • Norton Utilities
  • Other stuff*

*There is CAD and design software, high-end camera and imaging programs as well as other specialized software packages, each of which has its own upgrades. If you’re using any software that falls under that category, you can check with the developer about upgrades.

This is by no means a complete list, but it does cover most of the upgrades that average users would encounter.

How to check for updates:

Mac OS Updates and Apps purchased through The App Store: Pull down on the apple (upper left corner of the screen and select APP STORE

Microsoft Office: Pull down on HELP menu and select CHECK FOR UPDATES (Works with recent versions; versions before 2011 are no longer supported by Microsoft and no new updates are issued)

Adobe Flash Player: Open SYSTEM PREFERENCES (found in APPLICATIONS) and select FLASH PLAYER> UPDATES and click the CHECK NOW button

Adobe Reader: Pull down on HELP menu and select CHECK FOR UPDATES

Firefox: Pull down on the FIREFOX menu and select ABOUT FIREFOX (updates, if required, will be downloaded automatically) – click on RESTART FIREFOX TO UPDATE

Google Chrome: Pull down on the CHROME menu and select ABOUT GOOGLE CHROME – enable SET UP AUTOMATIC UPDATES FOR ALL USERS (a one-time process)

Quicken/QuickBooks:  Pull down on the QUICKEN (or QUICKBOOKS) menu and select CHECK FOR UPDATES

Norton: Pull down on the NORTON icon in menu (located to the left of the menu clock)

Avoid scams: Never click a link from an email or (especially) a web browser pop-up alerting you to upgrade any software. Anything that requires an upgrade can be performed from directly within the application!

Bottom line: You have to employ an “a la carte” approach to keep the software and operating system on your computer up to date – there is no “one process updates all” option available. In most instances, you do not need to apply an update the minute it’s available (although Flash Player is starting to claim it’s “out of date” when it’s only one revision old!), but it’s a good idea to check your software once in a while.

Continue Reading

Your Data: Are You Protected?

keep_calm_mouse_pad

Once again, a client tempted fate: His hard drive died without warning and he was unsure when his most recent backup occurred. Luckily for him, he had an Apple Time Capsule and the backup ran shortly before the big crash. (We also had a little trouble remembering the password to the Time Capsule unit, but were able to get through that challenge.)

So once again, a user’s data was saved because he did the right thing. But once in awhile, there is no backup, which means the recovery process is tedious, expensive, or not possible. I don’t like being a nag or a noodge, and using the expression “broken record” is a term that’s no longer relevant (despite the recent resurgence of vinyl albums), but it’s imperative that you MAINTAIN A REGULAR BACKUP OF YOUR DATA!!

One of the great things the engineers at Apple did was to integrate the backup into the operating system, which makes it simple and as painless as possible. It’s a “set & forget” process; as long as your computer is on and the the backup source is attached, then your computer will back up on its own. But there are certain things you have to consider when planning your backup scenario.

The most common (and least expensive) option is simply connecting an external hard drive (commonly a USB model) to your Mac and configuring the Time Machine settings in your System Preferences. This is a fail-proof method, as long as you keep your external hard drive attached to the computer (at least once in a while). For desktop models, you simply set the drive up behind the computer and then forget about it.

But for laptops, manually connecting the external drive to your computer and allowing it to complete the backup process is another step that you have to remember. Also, if you’re in an office or household with multiple laptops like so many of us are, it’s a matter of buying an external drive for each computer (a 1TB external drive is around $60), or share a single drive among the users.

However, that defeats the purpose of “set & forget” (not to mention the possibility of filling up the drive quickly), so Apple has come up with the next level; its AirPort Time Capsule, a combo wireless router/backup device. Currently available in 2TB and 3TB versions, it can be configured to back up any number of devices connected to it.

While the Time Capsule may seem like the idea solution, it does have a couple of drawbacks. For one, it may not be feasible in an environment that is networked with devices other than Apple branded ones. (There certainly are many non-Apple network backup devices available on the market; they have various degrees of ease of configuration.) Also, similar to a local drive, if there is a fire or theft, your data is gone along with your computer, not an enviable position to be caught in.

That leads us to cloud backup. There are scores of cloud backup services out there; the trick is to to find the one that best suits your needs. Some are expensive; some don’t back up large data files such as photo libraries and email databases. Some offer the option of recovered files to be shipped out on an external hard drive; some are all of the above or none of the above. Any data backed up on the cloud takes time to recover (particularly large files), so you have to factor that into your decision making process.

Bottom line: You should employ a two-tier backup strategy, both local and a cloud backup. You should also consider making a copy of your valuable data (photos, important documents) and storing it off site, in a safe deposit box, for example. Every six months or so, you should swap that copy out with a current copy. That way you’re protected in a worst case scenario. (Unless you go to the bank, and the safe deposit boxes have been relocated without your knowledge, something that happened to me years ago!)

Continue Reading

Your Password: Apple ID, iCloud or iTunes Store?

icloud-login

As we all know, having to remember a password is a pain in the neck. Keeping track of them is hard enough, and that doesn’t even count the various requirements (minimum number of characters, the inclusion of caps, numbers and other variables) that all your different websites dictate. Trying to keep things simple is near impossible; the best you can hope for is manageable.

For some strange reason, the one that gives people the most trouble is the Apple ID password. Perhaps it’s because it has multiple names – Apple ID password, iCloud password, App Store password and iTunes Store password, among others. In addition, it has a number of requirements – must be eight (or more) characters long, have one number and one cap. Oh yeah, and if you changed it within the past year, you can’t have a password you had used previously. All which adds the stress of keeping organized.

First of all, it’s best to get familiar with things. Your Apple ID handles the following tasks (among others):

  • Allows you to sync your contacts, calendars, notes and (Apple-based) email accounts.
  • Lets you purchase from Apple’s iTunes Store, App Store and iBooks Store.
  • Enables photo sharing between your Apple devices.
  • Required for upgrades to your Mac to the newest OS and other updates (security fixes, etc.)

To add to the confusion, your current email address can be used as your Apple ID. So, to put that into perspective, if your email address is user@gmail.com, your Apple ID could also be user@gmail.com.

BUT (sticking with the above example) – if you’re using your Gmail address to log into anything Gmail related, then you would use your Gmail password. If you’re using your Gmail address as your Apple ID, then you would use your Apple ID password. NOTE – these passwords are probably different! And if your Amazon account also uses that Gmail address, there’s a (potential) third password in the mix!

So, that’s just one example of the confusion that can ensue. This is exactly the point where most people lose the plot. Whatever method you use to document your passwords, confirm that you have differentiated between your email password and your Apple ID password (and Amazon, and others).

Another wrinkle: Your computer admin password is (most likely) a DIFFERENT password to remember. This is used when installing software, and (sometimes) logging in when starting up and when the screen saver kicks in. It is usually a shorter and easier to remember password. BUT – in the past year or so, Apple has given users the option to use their Apple ID as the admin password for their Macs. Just more confusion…

But, if you’re forced to reset your Apple ID, go to www.icloud.com and click the “Forgot Apple ID or password” link. That will give you a choice of retrieving your Apple ID or resetting the password. You will have the option of receiving an email or answer the security questions. Go for the email; for some reasons, the question option rarely works.

Neither method is working for you? Then throw in the towel and call Apple. They’re pretty good when things deteriorate to this point. Oh, and once you change your Apple ID password, you have to remember to change it on all your devices `that use it (Macs, iPhones, iPads, iPods, Apple Watch). A real chore, but if I have to deal with this stuff all day long, you can cope with it for a few minutes.


Continue Reading

Virus? Or Scam?

scampop
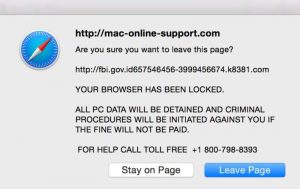
Although there was a news story this week regarding a new Mac virus (read here), Apple products are usually not targeted for viruses or malware. Because less than 10% of all computers worldwide are Macs, there are greener pastures as far as troublemakers are concerned. But there are still scammers out there that prey on user’s insecurities and are able to try to make a few bucks by thinking we have a virus.

First of all, actual viruses on the Mac ARE rare. Although there are some out there, most of the time Mac users report an issue is one of two things; some malware on the computer (which usually is in the Preferences folder of a web browser) or a “pop-up” window (like the one pictured here) that informs the user that there’s trouble, and tries to extort money from them.

BTW – the graphic here is simply a web page that’s supposed to alarm you – not a real virus. Quitting your browser (Safari, in this case) will solve the problem in most instances.

First of all, as I’ve mentioned MANY times before, never let anybody you don’t know tell you there’s something wrong with your computer (even if there really is something fishy going on)! Chances are these guys are crooks, trying to get some money to “fix” your problem. They may not necessarily be trying to steal your identity, but simply trying to make a quick money grab. This also goes for unsolicited phone calls that are commonplace these days.

Bottom line – if you’re having an issue with your computer that you think is a virus, call a trusted Macintosh expert, or even make an appointment at Apple’s Genius Bar. Better get the opinion of somebody you can trust, rather than depend on strangers control your computer or claim to be able to solve your issues from afar.

Continue Reading

Is Your Hard Drive Almost Full? Danger, Will Robinson!

startupfull-border

Although you probably never even think about it, you’re constantly filling up your computer’s hard drive every time you add work files, photos, music, movies and when you back up your iPhone or iPad. Weeks and months of slowly adding data to it will eventually fill it up. But you’re saying “I have plenty of disk space! No harm, no foul, right?” WRONG!

Filling your hard drive to capacity can have a catastrophic effect on your life, mostly because it can compromise your computer files. But what exactly are the issues of pushing your storage to the limit on your internal drive?

  • Danger of crashing: A full drive can die at any second, creating a problem far larger than the inability to import photos from your iPhone. Ask anybody whose hard drive has crashed; the 50% who didn’t get their data fully recovered are the best people to ask.
  • Overall sluggishness: It can slow some applications down or render them inoperable. With too much stuff crammed onto your internal drive, everything will slow down from a little to a lot. And some applications, which depend on having some free space (Photoshop, for example), will not be able to function at peak efficiency without a large enough block of unused space on your drive.
  • Diminished functionality: It reveals itself in subtle ways, but things that previously performed well will suddenly stop working. One example – Spotlight search will become disabled. Spotlight is the function that allows you to search your computer for files. It also works within certain applications (mail programs, for example) and will not be able to search for messages.

What can you do to confirm there is ample room on your startup disk?

For one, a good rule of thumb is to maintain at least 10% of your hard drive as free space. (More if possible.) I know that megabytes, gigabytes and terabytes confuse people (too close to the metric system for most of our tastes). But since most people are visual, open Disk Utility (found in Macintosh HD>Applications>Utilities) and highlight your startup disk in the left-hand column. The bar graph will give you a visual representation of how full your hard drive is.

But where do you find files you can safely remove from your hard drive that won’t trash your valuable data or cause an issue with the system or application functionality?

Start by emptying the trash. That could possibly be all you need to do; if not then go into your Downloads folder (Users>user name> Downloads) and see if there are files (or installers) in there you can trash.

Another idea: Check your Documents folder (Users>user name> Documents) for any files or folders you can offload onto an external drive.

Other ideas for freeing up space on your hard drive:

  • Uninstalling unused applications (Old versions of Adobe Creative Suite, for example)
  • Removing your iPhoto Library (Only if you’ve upgraded to Photos!)
  • Trashing rebuilt Entourage or Outlook Databases
  • Look for any duplicate folders
  • Remove your backed up iPhone or iPad data (this will eventually repopulate, but it’s a quick and dirty way to free up space in a hurry) by trashing the folder named MobileSync, which is found in Users>user name> Library>Application Support

Note: Your user Library folder is hidden by default. To access it, in Finder pull down the GO menu while holding down the Option Key and selecting LIBRARY.

Important safety tip: Know what you’re getting into before deleting any of these items – and back up your Mac BEFORE doing any of this!


Continue Reading

Should You Update To El Capitan?

el-cap

Apple certainly can be a noodge about updating to its latest OS (operating system), El Capitan, X.11. Whether it’s the annoying red number that is part of the App Store icon or the notification that constantly appears in the upper right corner of your screen, Apple certainly isn’t shy about hectoring you to upgrade. But should you?

Anybody who has worked with me for any length of time knows I’m the last one to tell clients to upgrade for the sake of upgrading. I upgrade as soon as a new version is released, but that’s my job. By using newly updated software on a regular basis, I get a pretty good feel for the advantages as well as any flaws of the update.

First of all, you should check that you have enough RAM. Simply pull down on the apple in the upper left corner of the screen and select ABOUT THIS MAC. You’ll quickly be able to tell the amount of installed RAM on this pane. (See below.)

About This Mac

A minimum of 4GB is recommended; I say double that, if possible. RAM is extremely inexpensive as compared to prices in the past, so consider maxing out your computer. (See my blog post from July 2013 here.) In addition, a minimum of 6GB of hard drive space is also required.

On the plus side, El Capitan gives you a bunch of remedies that you probably won’t notice on a daily basis. These include fixing a WiFi glitch that plagued Yosemite (OS X.10) users, an automatic permissions repair process and a bunch of security patches. Bottom line – it’s mostly stuff that’s important behind the scenes but helps your Mac run more effectively. Between the download and installation process, plan on it taking around an hour.

Liabilities of installing El Capitan:

If you’re still using iPhoto to store your pictures, then you should avoid upgrading until you’re ready to deal with Apple’s Photos application. (See my blog post from April 2015 for more information on Photos.) Furthermore, I would advise against installing on computers from 2011 and earlier, despite what Apple says.

Bottom line: Not necessary, but if you’re into keeping up to date and having the latest and greatest software installed, go for it. If you don’t plan on upgrading and everything is working well, then no harm, no foul.

* Needless to say, never perform ANY upgrade without confirming you have a recent backup of all of the data on your computer.

Continue Reading

A (Somewhat) Quick Trick To Speed Up Your Mac (And Eradicate The Spinning Beach Ball)

beachballEvery single one of us has experienced the colorful, spinning circle that indicates that our Mac is frozen (either temporarily, in which case it rights itself, or permanently, a situation where a forced reboot is required). There are many terms for this, including the beach ball, the spinning circle of doom and others, some not G-Rated. No matter what you call it, it’s annoying and a productivity killer.

It usually occurs when there’s a lot going on at once; e.g. many applications running and/or other data-intensive tasks (opening a large document, installing software, etc.) happening. In some instances it’s a wakeup call that your Mac needs more RAM. (Although in recent years, Apple has become less stingy with new computers as far as RAM is concerned, but 4GB is the absolute minimum anybody should be working with today.) But it can also occur when your permissions need repairing, at least when you’re working in OS X.10 (Yosemite) and earlier versions of the operating system.

First of all, check how much RAM your Mac has installed. That’s easy – simply pull down on the apple in the upper left corner and select “About This Mac” to find out. (Note that the appearance of this pane varies among the different versions of the OS, so it may not look exactly like the illustration below.) You can find out how much RAM your Mac can handle by visiting a site like Low End Mac and finding your model.

RAMHere you’ll see I have 16GB of RAM on my MacBook Pro

Now for the fun part – repairing your permissions! This involves a little more effort, and you may want to print this page (or at least write down the steps), as you won’t be able access the Internet on the computer you’re working on.

The first step is to quit out of all open applications and reboot your Mac by pulling down on the apple in the upper left corner and selecting Restart… Once it begins to reboot, hold down the Option key (the key to the left of the space bar) and keep it down until a choice of bootable disks appear. In most cases, there’s one with “Recovery” in its name. (If there isn’t another option besides your startup disk, see Note #2 below.) Click on that disk and allow the utility window to appear.

You’ll have a few choices here; select Disk Utility. Once that’s open, highlight your disk in the left column (chances are it’s named “Macintosh HD”) and then click the “Repair Disk Permissions” in the lower part of the window. Allow it to complete its duty, and don’t freak out if it finds a lot of issues, that’s par for the course. Once that’s complete, you might as well select “Repair Disk” while you’re in the neighborhood.

DU YosemiteClicking “Repair Disk Permissions” usually helps eliminate the beach ball

Once that’s complete, quit (Command + Q) out of both Disk Utility and the utilities window. Select Restart to boot your Mac normally. Hopefully that’s all it takes to solve the spinning beach ball issue!

A few notes:

In the latest Mac OS (OS X.11 El Capitan), this process is no longer required. Permissions are repaired while other tasks are performed, such as installing updates from Apple. Read a great article on that here.

If you don’t have the option of a recovery drive to boot your Mac from (as described above), you can use a bootable USB flash drive. They’re available from Amazon.com here.

If you need more RAM, I recommend Data Memory Systems. DMS has great prices, delivers quickly and its customer service is first-rate. I have no affiliation with the company; I’ve just had nothing but great experiences for many, many years.

Continue Reading

The Unsyncable Contact: “iCloud” vs. “On Your Mac”

contacts

Have you ever added a contact to your Mac, expecting it to sync with your iPhone, and then been disappointed because it never made it over? Particularly when you needed it most?

Chances are the contact never synced to your iPhone because on your computer your contacts are probably divided into two different accounts: “On My Mac” and “iCloud”. The secret to having all your contacts are synced across your devices is to double-check that they’re contained in “iCloud” and that you’re signed in to iCloud and contact syncing is enabled. But how exactly do you confirm all your contacts are in the appropriate account?

The first thing to do is to open Contacts on your Mac. It’s in the APPLICATIONS folder; chances are it’s in your dock as well. (If it’s not, you can certainly drag it in there.) Once it’s open, pull down on the CONTACTS menu (top left of screen, to right of the apple) and select PREFERENCES.

Blog1Next, select the ACCOUNTS tab on the top of the window and confirm your iCloud account is enabled in the left column. If it’s not, click the plus (+) sign in the lower left corner to add it. Select “iCloud” from the list of options and sign in using your Apple ID and password.

Blog2Once you’ve successfully signed in, close Preferences. You should then see your contacts flowing in (assuming you have contacts in iCloud). Then click on “All on My Mac” in the left panel of your Contacts book, select all the contacts (Command + A) and then right click (CONTROL + Click) and select EXPORT V CARD.

Blog3Choose the Desktop as the destination. Then select the file on your desktop and drag it directly on top of “All Contacts” in iCloud. Confirm you want to import it; it will also check for dupes.

BLOG4

Continue Reading

Some Thoughts About Apple’s New Streaming Music Service

applemusic

If you’ve been listening lately, you’ve no doubt heard that Apple has finally flipped the on switch to its long-rumored streaming music service. Whether it was from the entire Taylor Swift debacle or simply the pundits talking about it on the financial networks, it certainly was big news when it launched last week. In case you need a primer on the service, check out MacWorld’s piece here.

Full disclosure: I don’t plan on venturing beyond the “free trial” into paying territory. I simply haven’t gotten into the streaming music movement, whether it’s online (Pandora, Spotify, Deezer, etc.) or satellite radio and certainly don’t feel like paying more for music, seeing that I have somewhere around 24,000 songs in my iTunes Library (and 30 years worth of the associated CDs, now residing in Wal*Mart bins in my basement). So you can assume that if I want to listen to something, I’ll probably buy it.

Anyway, here’s how to get started:

On your Mac: Once you upgrade to iTunes to version 12.2 (which requires Mac OS X.9 – Mavericks), you then launch iTunes and look for the “For You” menu at the top of the page. Not there? Then go to Apple’s Music Webpage (https://www.apple.com/music/membership/) and click “Try Now” which should update your iTunes page. Then click back on “For You” and then click on the “Start 3-Month Free Trial” button and follow the sign-in wizard.

On your iPad or iPhone, upgrade to iOS 8.4 and then launch the Music app. In the upper left corner, tap the “user” icon (red circle) and then the link for “Join Apple Music.” In both instances, you can start off easy with its “3 Month Free Trial” but you still have to enter your payment info (and which plan – “Individual” or “Family” – you want to sign up for), even if you’ve already decided on cutting off the service on day 89. Important note: Before you start streaming music on your iPhone, you’ll want to check your cellular plan re: data usage and all that fun stuff. Nothing is worse than getting hit with unexpected overage charges!

Once you’re in that far, it’s remarkably similar to other streaming services – you select which genres of music you like to listen to, and going down one more level, indicate which artists you like. You’ll then get playlists of music based on your input (and no doubt based on other listener’s preferences).

Whether this service satisfies your appetite for music and is worth the $9.99/month ($14.99/month for the “Family Plan”) is an individual decision. If you’re an Apple fanboy (or fangirl), there probably is no reason to go elsewhere; to be honest, I haven’t compared the artist roster of any of the streaming services. I know there are some holdouts, Def Leppard for one. (And Def Leppard has sold more than 100 million albums, so I would imagine that anybody who wants to hear them already owns their albums, or at least the first four!) But for now, I’m not planning on signing up anytime soon. Nothing personal, it’s just another thing I don’t need to spend my time on.

Oh, and one more thing: Another component of the service is “Apple Music Connect,” yet another social media platform to occupy your time. While this certainly makes sense for the up-and-coming artist, it’s probably little or no use for classic or legacy bands. Again, I spend far too much time in front of the computer screen (my own and those of clients), so any free hours outside of the family/work/house trifecta are better spent running, mountain biking or on the tennis court.

Continue Reading