October 17, 2019
The Art of Handling Updates
One of the most common complaints I hear from clients is “I don’t know what to update!”
If you own a Mac, it’s a pretty simple process (at least in theory). Updates for the Apple OS (operating system) are supplied by Apple. Similarly, updates for other software generally come from the manufacturer of that package. Ergo, an update for Microsoft Office comes from Microsoft, Photoshop from Adobe, Norton updates come from Symantec, etc.
Except for printers, as Apple now handles most of those updates as part of its OS updates through the App Store. Oh, and speaking of The App Store, apps bought through there have their updates supplied by Apple, even though most are third-party apps…
OK, so it’s not quite as easy as it should be. And furthermore, how do you tell which update prompts are legit and which ones are scams? Read on!
OK, updates (for the most part) fall under one of the following categories:
- Mac OS
- Apps from The App Store
- Microsoft Office
- Adobe Creative Suite
- Adobe (Flash Player & Reader)
- Firefox
- Google Chrome
- Intuit (Quicken & QuickBooks)
- Norton Utilities
- Other stuff*
*There is CAD and design software, high-end camera and imaging programs as well as other specialized software packages, each of which has its own upgrades. If you’re using any software that falls under that category, you can check with the developer about upgrades.
This is by no means a complete list, but it does cover most of the upgrades that average users would encounter.
How to check for updates:
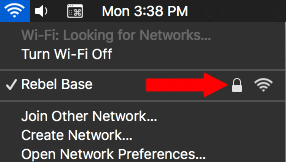
Mac OS Updates and Apps purchased through The App Store: Pull down on the apple (upper left corner of the screen and select APP STORE
Microsoft Office: Pull down on HELP menu and select CHECK FOR UPDATES (Works with recent versions; versions before 2011 are no longer supported by Microsoft and no new updates are issued)
Adobe Flash Player: Open SYSTEM PREFERENCES (found in APPLICATIONS) and select FLASH PLAYER> UPDATES and click the CHECK NOW button
Adobe Reader: Pull down on HELP menu and select CHECK FOR UPDATES
Firefox: Pull down on the FIREFOX menu and select ABOUT FIREFOX (updates, if required, will be downloaded automatically) – click on RESTART FIREFOX TO UPDATE
Google Chrome: Pull down on the CHROME menu and select ABOUT GOOGLE CHROME – enable SET UP AUTOMATIC UPDATES FOR ALL USERS (a one-time process)
Quicken/QuickBooks: Pull down on the QUICKEN (or QUICKBOOKS) menu and select CHECK FOR UPDATES
Norton: Pull down on the NORTON icon in menu (located to the left of the menu clock)
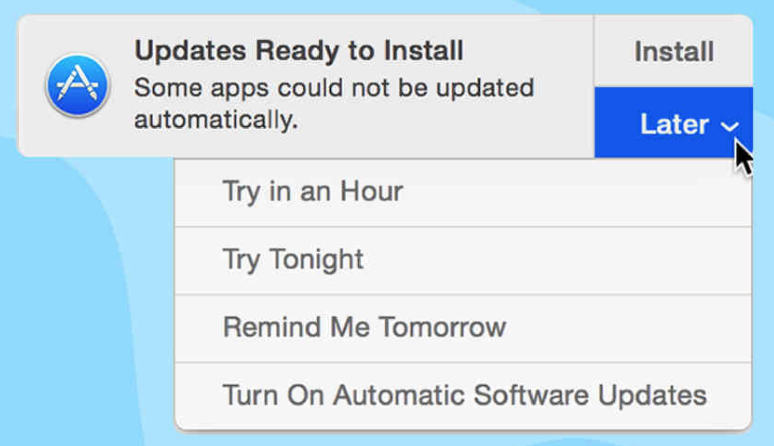
Avoid scams: Never click a link from an email or (especially) a web browser pop-up alerting you to upgrade any software. Anything that requires an upgrade can be performed from directly within the application!
Bottom line: You have to employ an “a la carte” approach to keep the software and operating system on your computer up to date – there is no “one process updates all” option available. In most instances, you do not need to apply an update the minute it’s available (although Flash Player is starting to claim it’s “out of date” when it’s only one revision old!), but it’s a good idea to check your software once in a while.


 Last month, I covered some basics in organizing your pictures using Photos on your Mac. This month, I’ll dig deeper into some of the most commonly-asked questions.
 Like many seemingly similar yet quite different choices in life (Coke or Pepsi, Mets or Yankees, Mary Ann or Ginger, etc.), the choice between browsers is a very personal one. Yet, people are often passionate about one of them for some particular reason. Or sometimes one is used as a matter of convenience. Sometimes even apathy plays a role, especially when users don’t realize that they have a choice in which one they use.
 Way down on the food chain, there are some obscure browsers that some swear by. (And others swear at.) These include Opera, Tor and UC Browser. Opera is built on the Chromium platform, which means nothing to 99.9999% of the world. Tor differentiates itself by running on the Tor Network, which maintains user anonymity. And then there’s UC Browser, a product of the Chinese company Alibaba Group, is the third most popular browser worldwide. Except for an iOS version, it’s of no interest to Mac users. And yes, you can forget about Internet Explorer (for the Mac, anyway) and Netscape Navigator. May they rest in peace.

 Apple has never been shy about informing you that there’s a new OS available for installation. Problem is, there is no gatekeeper that will let you know that you could easily get caught up into a tangled mess if you decide to do it on the day it’s released.
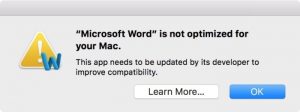 Annoying Apple trick – once you DO upgrade, most applications you launch will give you a warning about “not being optimized for your Mac.” Click OK and move on with your life.